⚡ The 60-Second Quick Start
- Go to app.nirmiq.com and create an account with your email and an organisation name.
- Log in. You land on your dashboard — explore a sample project, or create your first project.
- From the Admin panel, invite your team members by email.
- Start adding requirements, run FMEA, write tests, plan sprints — full systems engineering, in one place.
Sign up at nirmiq.com
Head to app.nirmiq.com and click Sign Up. You'll need:
- A valid email address (this becomes your login)
- Your full name
- A password (minimum 8 characters)
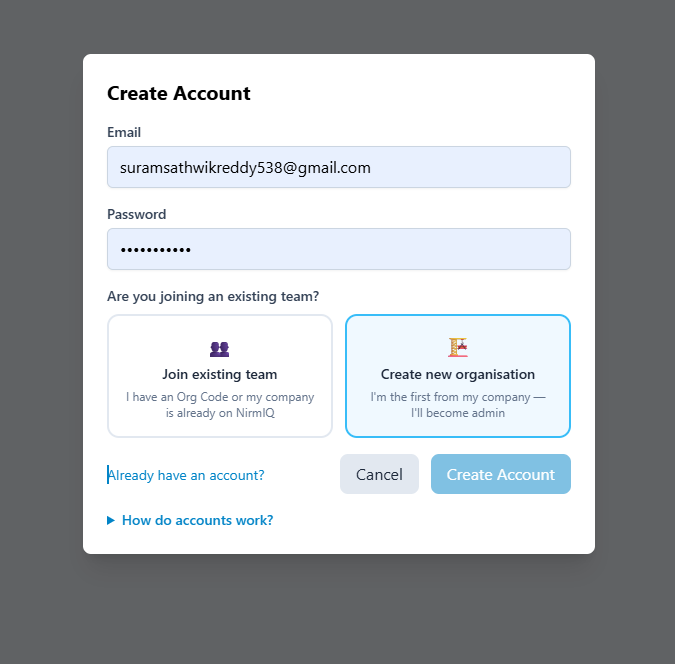
The NirmIQ sign-up page
Create or Join an Organisation
After signing up you'll either:
- Create a new organisation — you automatically become the first Admin of the organisation and get 5 free seats.
- Accept an invite — if a colleague already set up an org, click the invite link in your email to join.
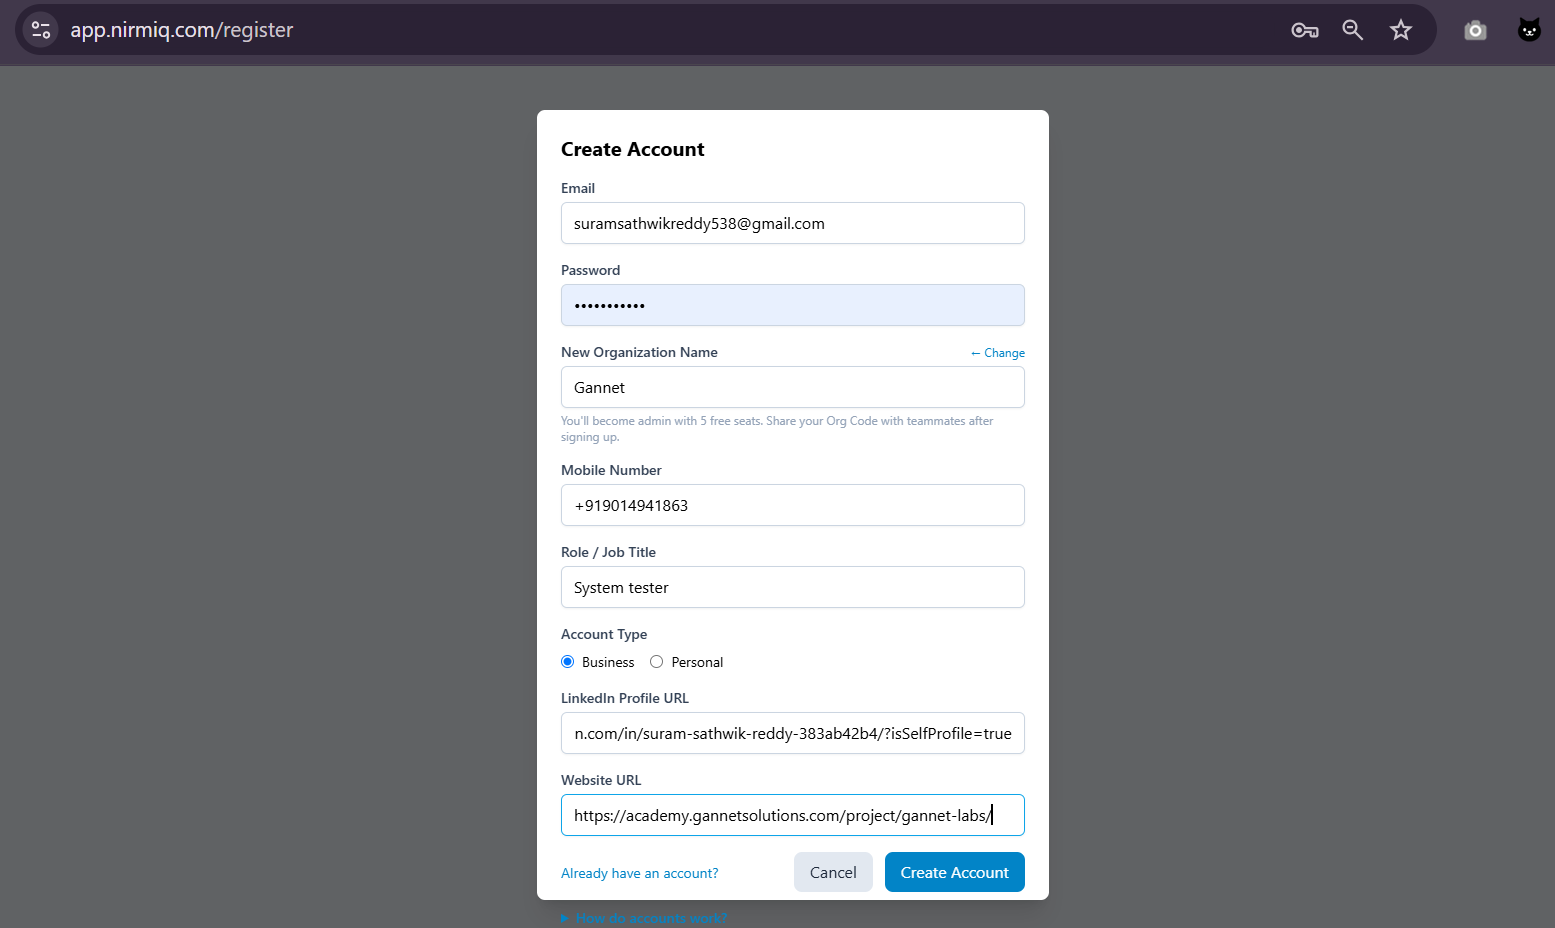
Create your organisation — you become the first Admin and get 5 free seats
Good to know
Every new organisation starts on the FREE plan with 5 seats — no credit card required.
The Dashboard
After logging in you land on the Dashboard. Here's what you'll see:
- Left sidebar — navigate between Projects, FMEA, Analytics, Settings, and more
- Project list — your projects plus any Sample Projects for exploration
- Quick actions — create a new project, import requirements, run AI analysis
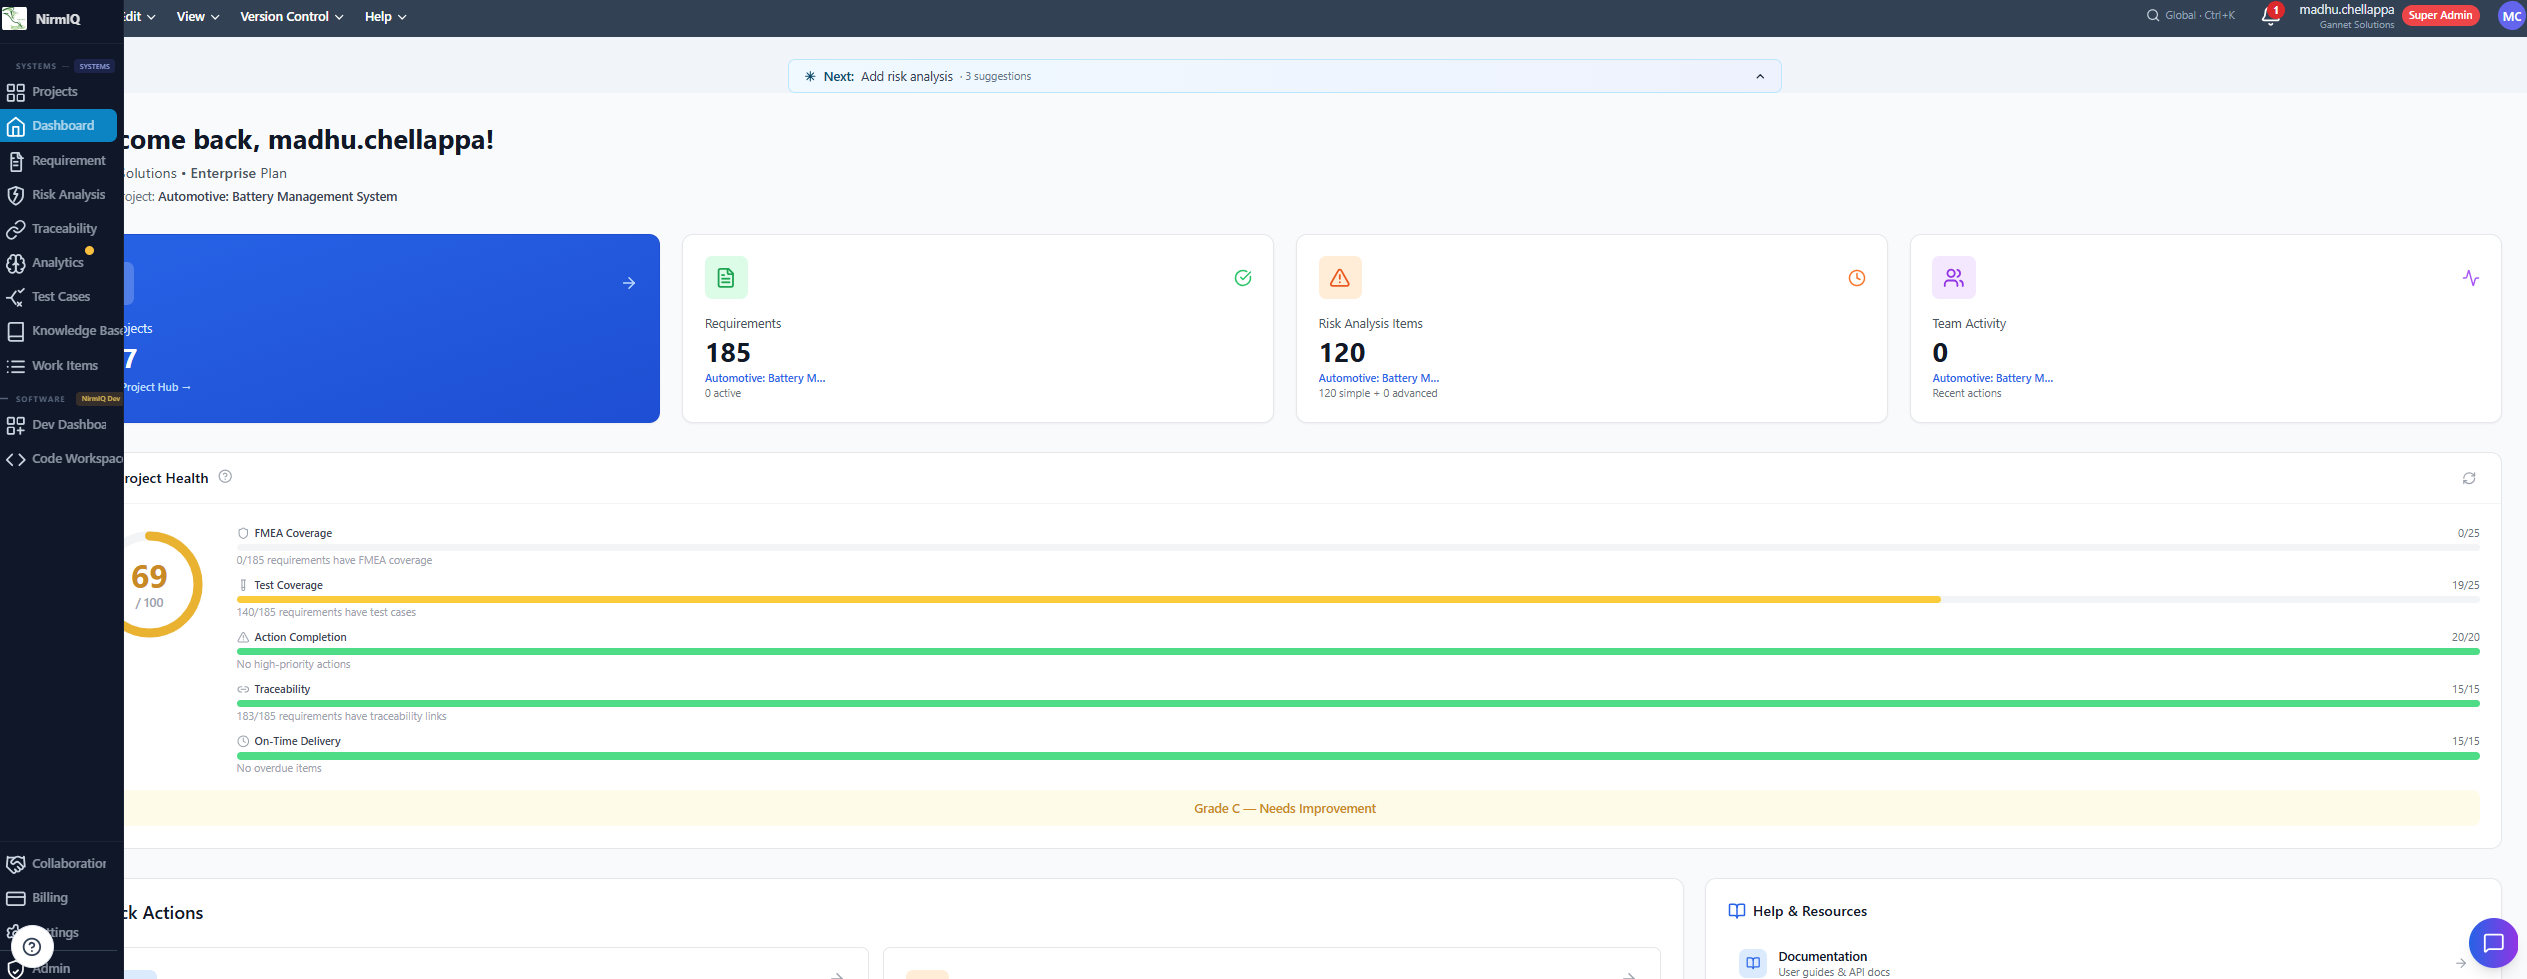
Your NirmIQ dashboard — the command centre for all your projects
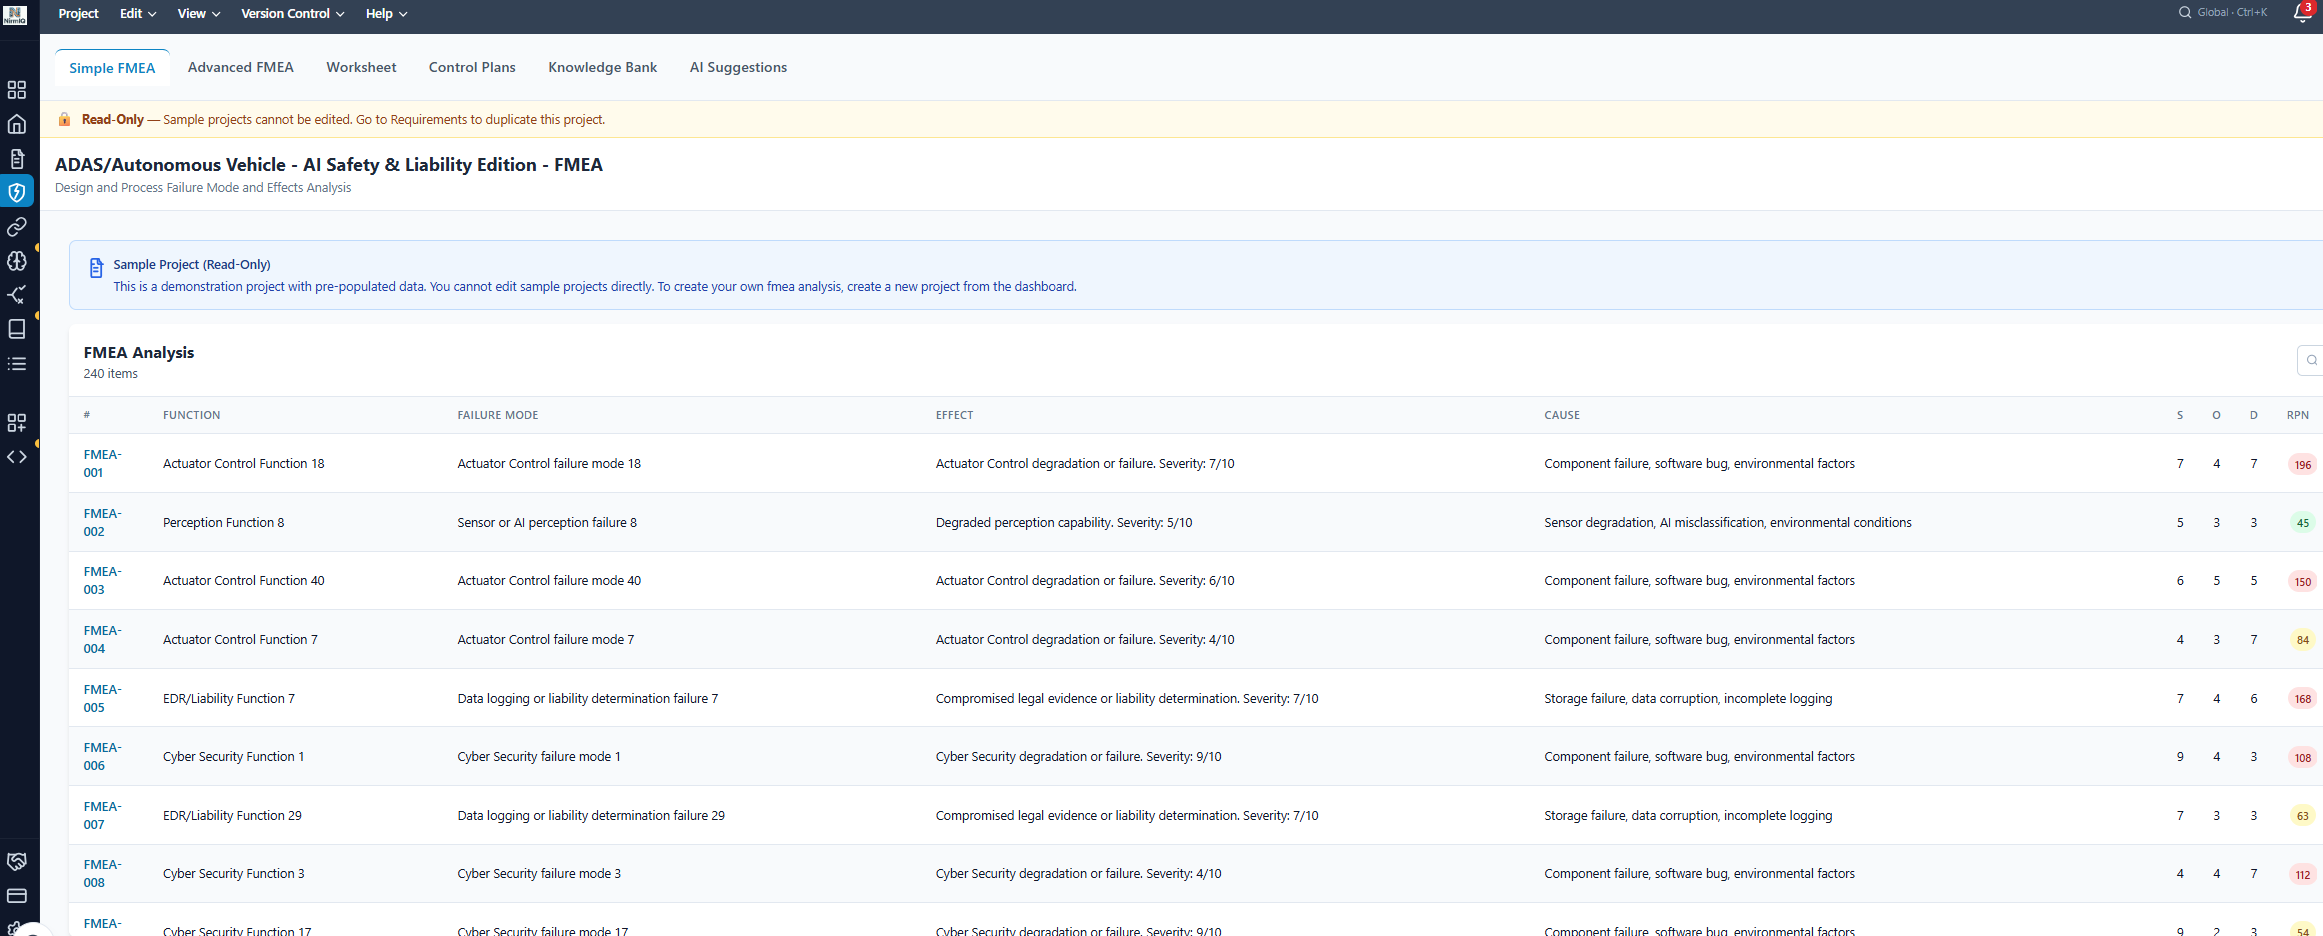
Explore the Sample Projects
NirmIQ ships with five pre-loaded sample projects so you can explore every feature before creating your own data. These are read-only and won't affect your seat count.
- Medical Device — Automated Insulin Delivery System (185 requirements, 120 failure modes)
- Aerospace — Flight Control System (185 requirements, 120 failure modes)
- Automotive — Battery Management System (BMS)
- Commercial Aviation — Next-Generation Narrow-Body Aircraft (large, 370 requirements, 240 failure modes; demonstrates lessons from Boeing 737 MAX MCAS)
- ADAS / Autonomous Vehicle — AI Safety & Liability Edition (large, 370 requirements, 240 failure modes; references real Tesla, Uber, Cruise, and Waymo incidents)
Go to Organisation Settings
Click your organisation name in the sidebar, then navigate to Members.
The Members page in your Admin panel
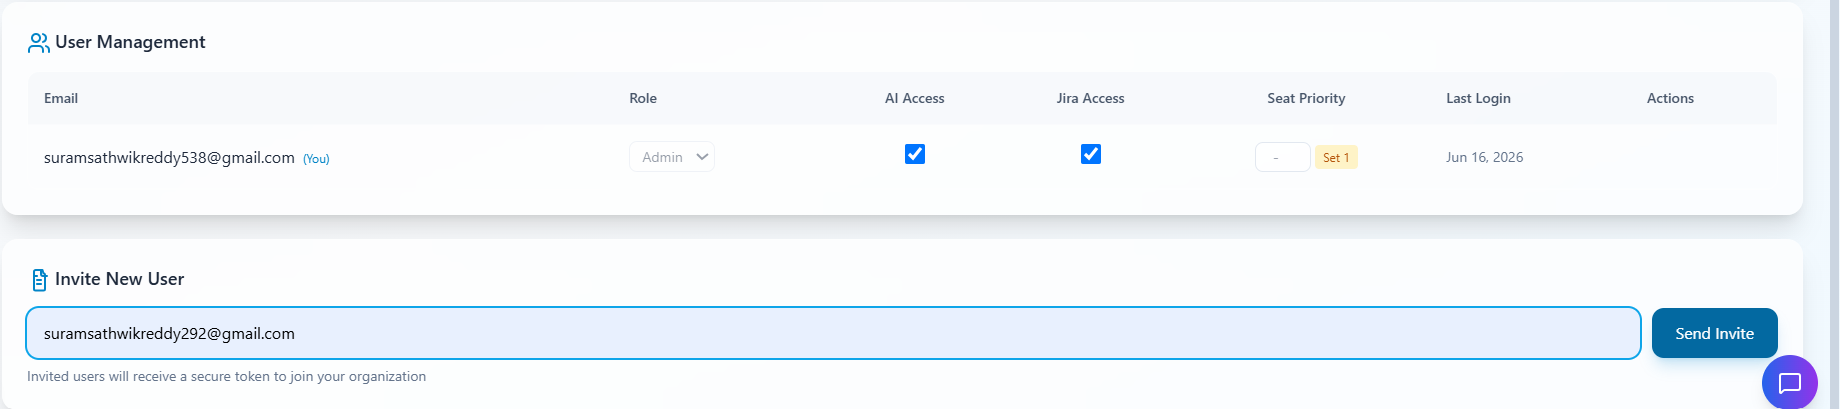
Send Invitations
Click Invite Member and enter their email address. They'll receive an email with a link to join your organisation.
- Roles available: User (standard team member), Admin (manage org, invite members, manage projects), and Super Admin (NirmIQ-side; not assigned by customer admins).
- Seat limit: You can invite up to the number of seats in your plan (5 for Free)
- Pending invitations count towards your seat total

Invite a teammate by email — they get a secure link to join
Seat limit reached?
If you've filled all 5 free seats and need more, you'll need to upgrade your plan — see Section 5 below.
Available Plans
NirmIQ follows a license-based model — your tier determines which features you can access, and the number of licenses determines how many people can use them.
| Plan |
Seats |
Key Features |
| Free |
5 (fixed) |
Requirements management, Simple FMEA, basic traceability, Excel/ReqIF import & export, sample projects. |
| Professional |
Per license
min 1 |
Everything in Free + DFMEA/PFMEA templates, structure tree, baselines, version history, test cases, Jira integration, comments & mentions, audit trail. |
| Advanced |
Per license
min 1 |
Everything in Professional + AIAG-VDA 7-Step FMEA wizard, AI document import, AI-assisted analysis, full traceability matrix, real-time collaboration, Slack integration, Git integration, digital signatures & e-signature workflows, FMEA Knowledge Bank. |
| Power |
Per license
min 3 |
Everything in Advanced + Code Intelligence (code↔requirements↔FMEA), MATLAB/Simulink, MS Teams, GitLab, Bitbucket, Azure DevOps, Jenkins, custom AI prompts, MFA (TOTP), compliance reports, change-control workflows, chat support. |
| Enterprise |
Per license
ENT_TEAM (min 5), ENT_OEM (min 10), ENT_SITE (min 25) |
Everything in Power + SSO/SAML, IP whitelisting, multi-org management, named-rep dedicated support & SLA, custom training, cross-project risk patterns. |
| Code Intelligence Add-on |
Per license
min 3 |
Adds Code Intelligence (code scan, code analysis, code-to-requirements, code-to-FMEA, bidirectional sync) to any base plan including Free. Sold separately as a per-user add-on. |
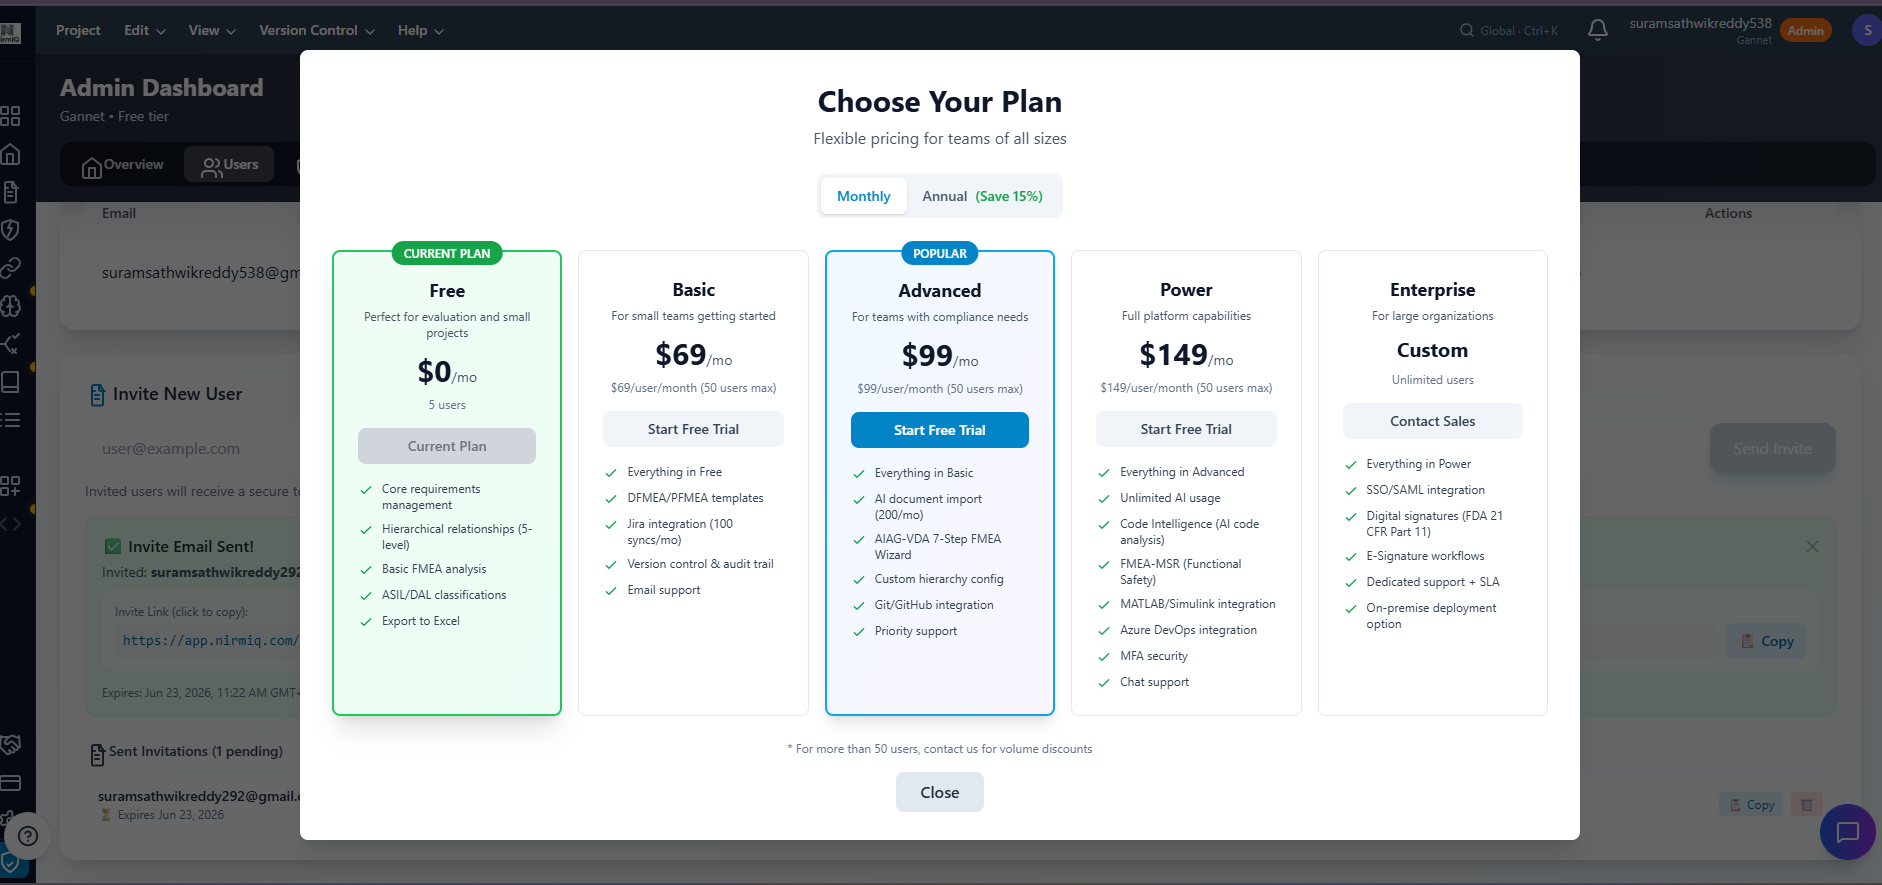
Plans & tiers — see what each unlocks before you upgrade
Tip — Tier vs. Seats
Your tier unlocks features. Your licenses (seat count) determine how many users can access the platform. They're independent — upgrading your tier doesn't automatically add seats, and adding seats doesn't change your tier.
Buy a Plan — In-App Self-Service
You can purchase and upgrade right inside NirmIQ — no waiting on email:
- Open Billing from the sidebar (or click Upgrade anywhere you hit a tier-gated feature)
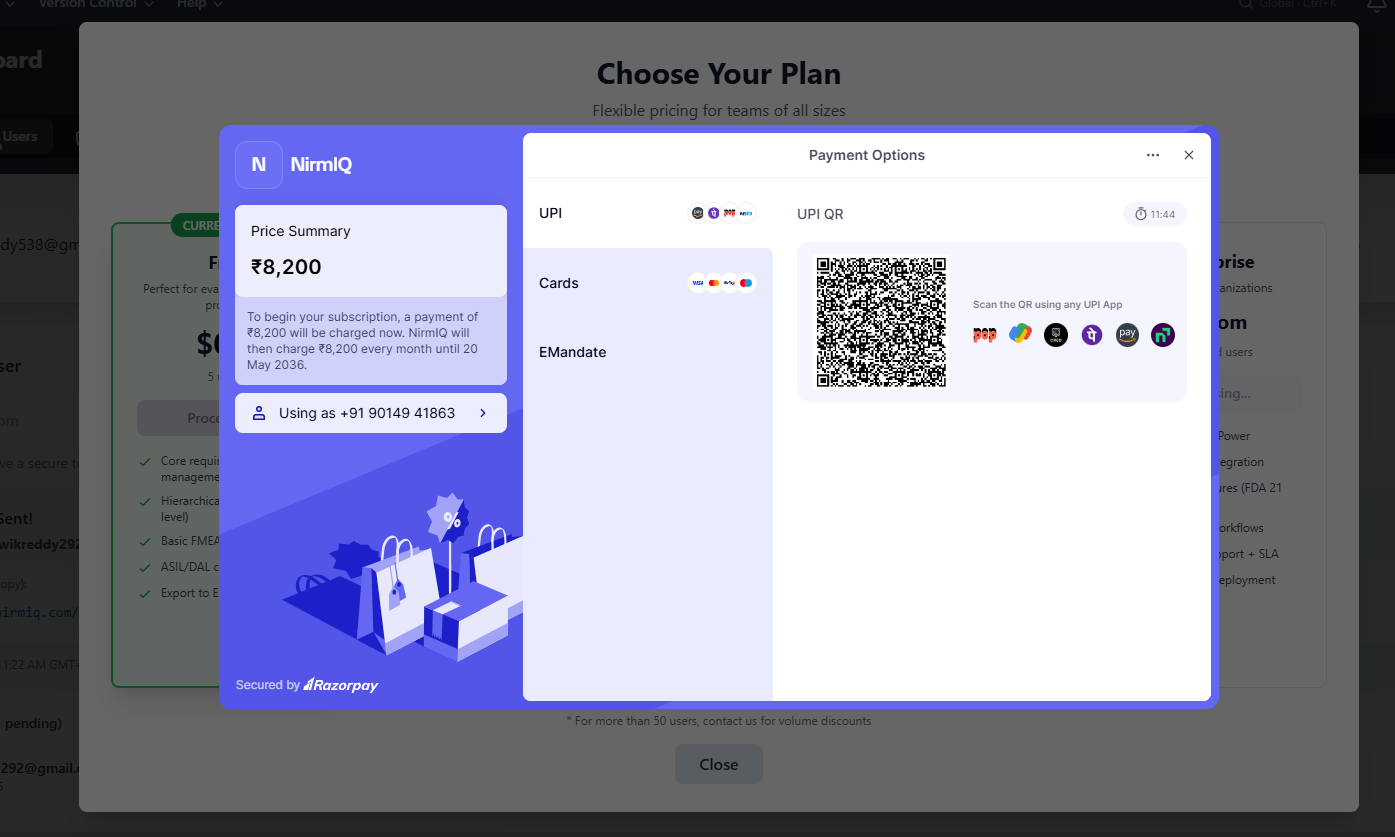
- Choose your plan and number of licenses — the page shows monthly and annual pricing in your currency
- Pay securely — checkout is handled by our payment provider (cards, UPI, net-banking, and more)
- Instant activation — the moment payment succeeds, your tier badge changes and the new features unlock across every project
Change plans anytime
Upgrade or change tiers from the same Billing page. If you start an upgrade and don't complete payment, your current plan stays exactly as it was — nothing changes until a payment succeeds.
Talk to Sales — Enterprise, Volume & Custom
For Enterprise plans (SSO/SAML, multi-org, dedicated support & SLA), large license volumes, purchase orders / invoicing, or help choosing the right tier, contact us:
- Email info@nirmiq.com with your organisation name, the tier you're considering, and how many licenses you need
- We'll set up the plan for your organisation and arrange invoicing where needed — usually within one business day
After Upgrading
Once upgraded, your organisation badge changes immediately and new features unlock across all your projects. You'll see the tier badge in your Organisation Settings, and your current plan, licenses, and payment history on the Billing page.
After upgrade — your tier badge changes and features unlock immediately
What is Beta Access?
Beta access flips a flag on your organisation that unlocks features that would otherwise be gated by tier — independent of your current plan. It is intended for:
- Evaluating NirmIQ's full capabilities before committing to a paid plan
- Early adopters who want to shape the product with feedback
- Pilot programmes within large organisations
What beta access does not change: seat counts, AI usage quotas, billing, or support SLAs. Beta access does not include the Code Intelligence add-on entitlements unless they were granted explicitly. Some workflow-level safeguards (for example, certain read-side permission checks) are independent of the tier check and are not bypassed by the beta flag.
How to Request Beta Access
- Email info@nirmiq.com with subject "Beta Access Request"
- Include your organisation name and a brief description of your use case
- Our team will review and typically grant access within 1-2 business days
What you get with Beta Access
Tier-gated features (advanced FMEA, AI analysis, integrations) are unlocked through the standard tier check, with your existing seat count unchanged. Beta access does not add extra seats and does not by itself enable the Code Intelligence add-on.
Step A — New Project
From the dashboard, click New Project. Give it a name, select a segment (Software or Safety), and optionally add a description.
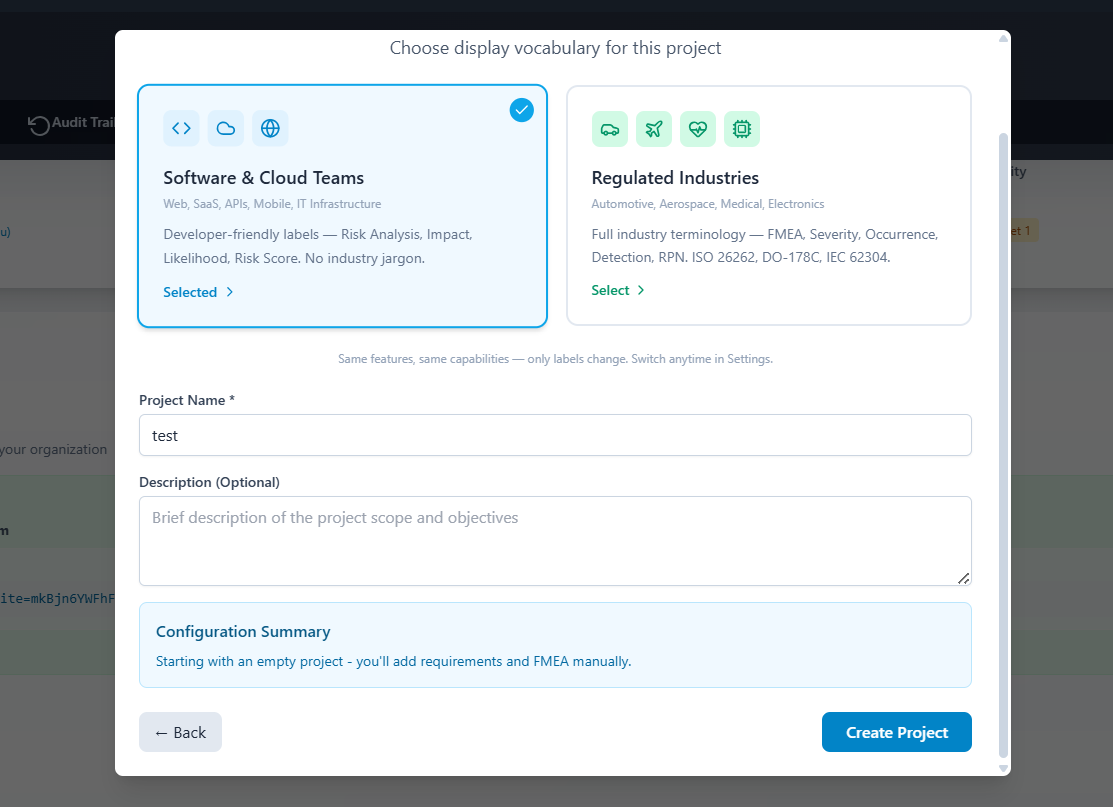
Creating a new project — pick your segment to customise the vocabulary
Step B — Add Requirements
Once inside your project, go to the Requirements tab. You can:
- Add manually — click "Add Requirement" for one-by-one entry
- Import from file — upload a CSV, Excel, or ReqIF file
- AI-assisted import — paste a Word/PDF/Excel document and let AI structure it (Advanced plan and above)
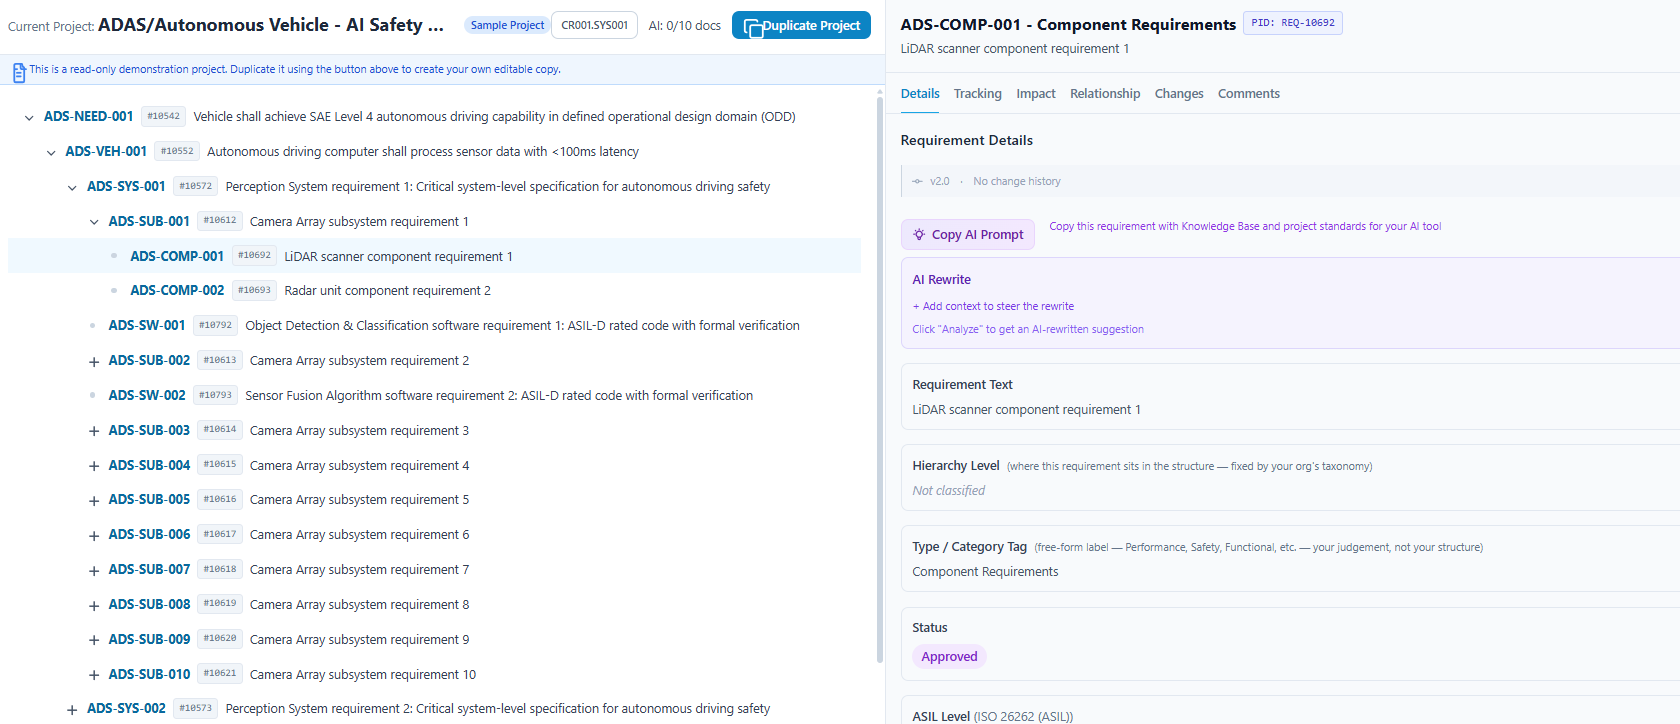
Requirements tab — hierarchy view with custom IDs and status
Step C — Run FMEA Analysis
Navigate to the FMEA tab. NirmIQ supports both Simple FMEA (quick risk assessment) and Advanced FMEA (full AIAG-VDA 7-step process with structure trees, action items, and RPN tracking).
FMEA tab — Simple or full AIAG-VDA 7-Step risk analysis
Step D — Verify with Test Cases
Open the Test Cases tab to prove your requirements are met. Each test case has structured Steps and an Expected Result, can be assigned to an engineer and tagged, and links back to the requirement (and the FMEA risk) it covers.
- Create a test case, or click AI Generate to draft tests from requirements and FMEA (Advanced plan and above)
- Record runs — log a result (passed / failed / blocked / skipped) with notes; a run history is kept and the status updates automatically
- Import / Export — bring tests in from CSV or Excel, or export to CSV, Excel, or a PDF test report
- Track coverage — the dashboard shows pass rate and the status split; the Traceability view highlights anything untested
See the full guide in the Test Cases documentation for assignment, tags, version history, and bulk actions.
Tip — Software vs. Safety Segment
The segment you choose only changes labels and vocabulary (e.g., "Risk Analysis" vs. "FMEA", "Impact" vs. "Severity"). All features and capabilities are identical between segments.
Where to go next
Once your first project has requirements and an FMEA, these are the modules worth exploring. Open them from the left sidebar inside a project. (Some are unlocked at higher tiers — see Plans & Tiers above.)
- Requirements — your hierarchical spec: add, import, baseline, and version requirements; track status through the review workflow.
- FMEA / Risk Analysis — Simple FMEA for quick risk scoring, or the full AIAG-VDA 7-Step wizard with structure trees, action items, and RPN tracking. Advanced for the 7-step wizard.
- Test Cases — prove requirements are met; record runs, track pass rate and coverage (see Section 7, Step D).
- Traceability — see how requirements connect to FMEA, tests, and work items; spot anything untested or unlinked at a glance.
- Analytics — dashboards for risk distribution, coverage, top risks, and compliance readiness (including ASPICE).
- Work Items & Sprints — turn accepted requirements into work, plan sprints, and track velocity, burndown, and team progress in Insights.
- Collaboration — comments, @mentions, and notifications keep your team aligned without leaving the requirement. Professional+
- Integrations — connect Jira, Slack, and Git so NirmIQ fits your existing workflow. Advanced+
- Knowledge Bank & Knowledge Base — reuse proven failure modes and capture lessons learned, standards, and decisions for your team.
- Code Intelligence — link code to requirements and FMEA, scan a repository, and generate requirements or failure modes from code. Power or the Code Intelligence add-on.
Tip — Start with a sample
Not sure where to begin? Open one of the five read-only sample projects (Section 2) and click through these modules with real data before building your own.
Support Channels
| Channel |
Best For |
Response Time |
Email
info@nirmiq.com |
General questions, upgrade requests, account issues |
Within 24 hours |
In-App Feedback
(Feedback button in bottom-right) |
Quick suggestions, UI issues, feature requests |
Reviewed weekly |
Bug Reports
info@nirmiq.com |
Something broken? Tell us exactly what happened |
Triaged within 12 hours |
How to Report a Bug
Great bug reports help us fix things fast. Please include:
- What you were doing — the steps to reproduce the issue
- What you expected — what should have happened
- What actually happened — error messages, blank screens, wrong data, etc.
- Screenshot or screen recording — a picture is worth a thousand words
- Browser & device — e.g., Chrome 124 on Windows 11
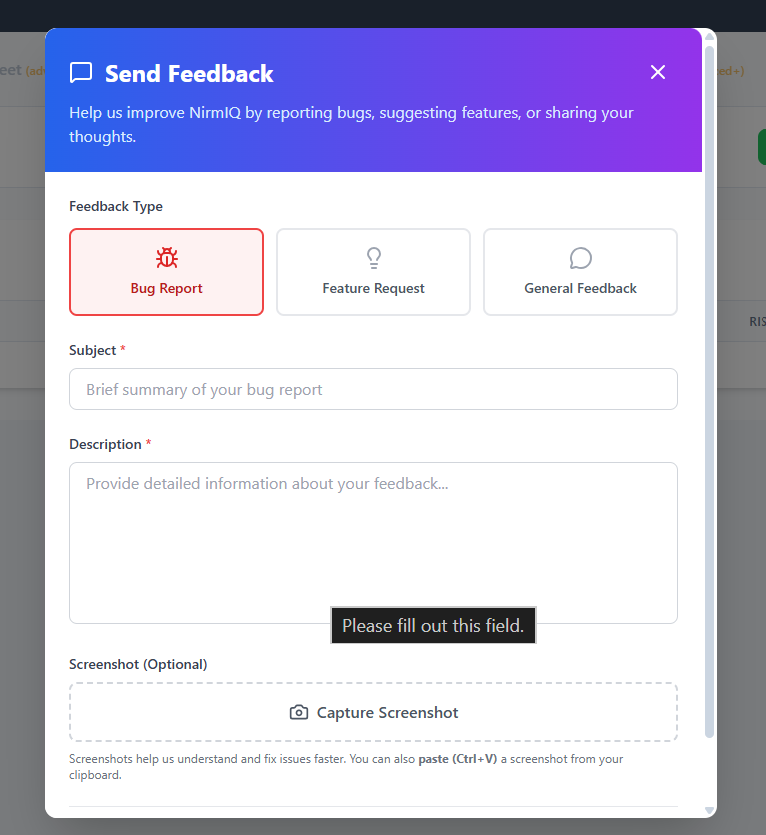
The in-app feedback button — bottom-right of every page
Quick Links
- Documentation: docs.nirmiq.com
- Release notes: Check the announcements banner in your dashboard